Who can use this feature?
The Jobs Portal displays read-only CaMS data allowing service providers to see a more complete picture of their clients within the Jobs Portal.
Frequently asked questions
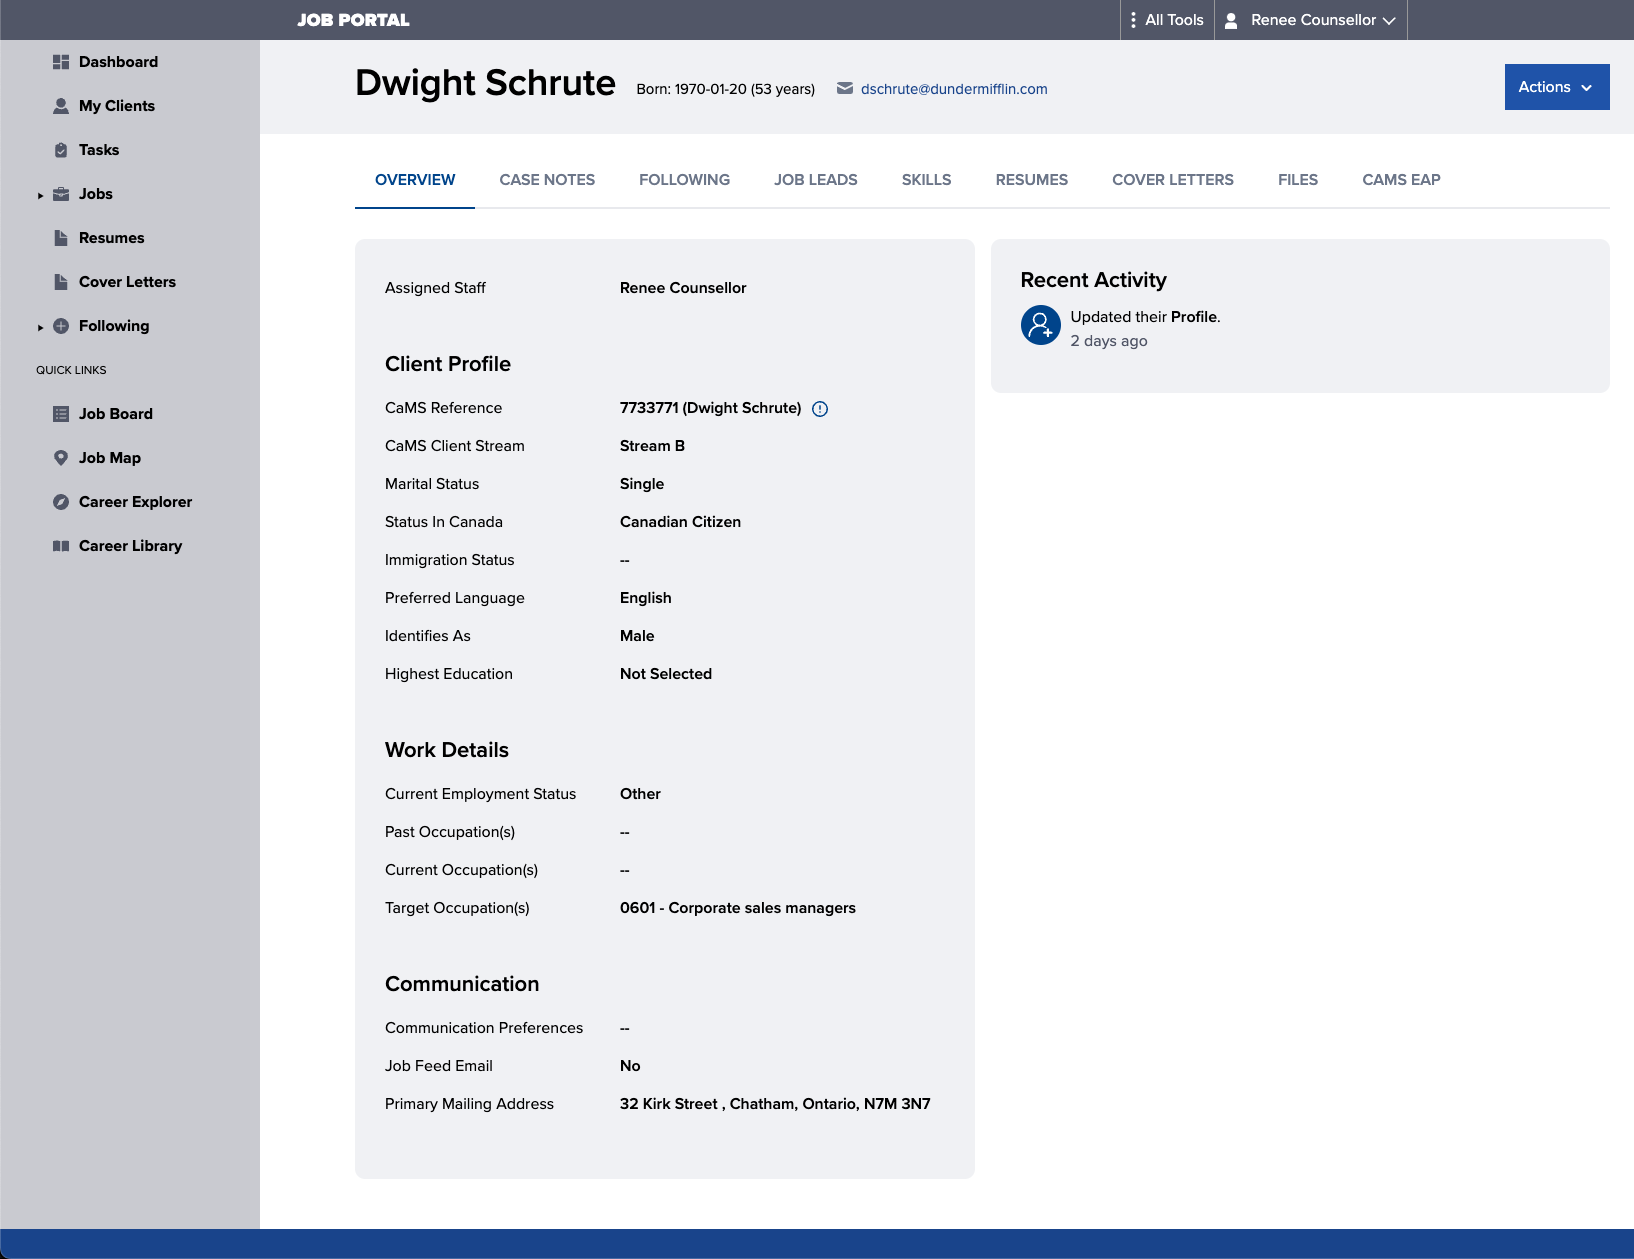
Client Details
In the My Clients / People screen, the CaMS reference number will be shown next to the user name for those who have a linked CaMS account.

The preview panel will display some of the available CaMS data including:
- Reference Number
- Client Stream
- Marital Status
- Status in Canada
- Immigration Status
- Preferred Language
- Identifies As
- Employment Status
- Highest Education Level

The Overview tab within the Client Profile will display all of the CaMS data mentioned above, along with the ‘Primary Mailing Address’.
Employment Action Plan (EAP)
Also within the Client Profile, a CaMS EAP tab displays the client’s Employment Action Plan.
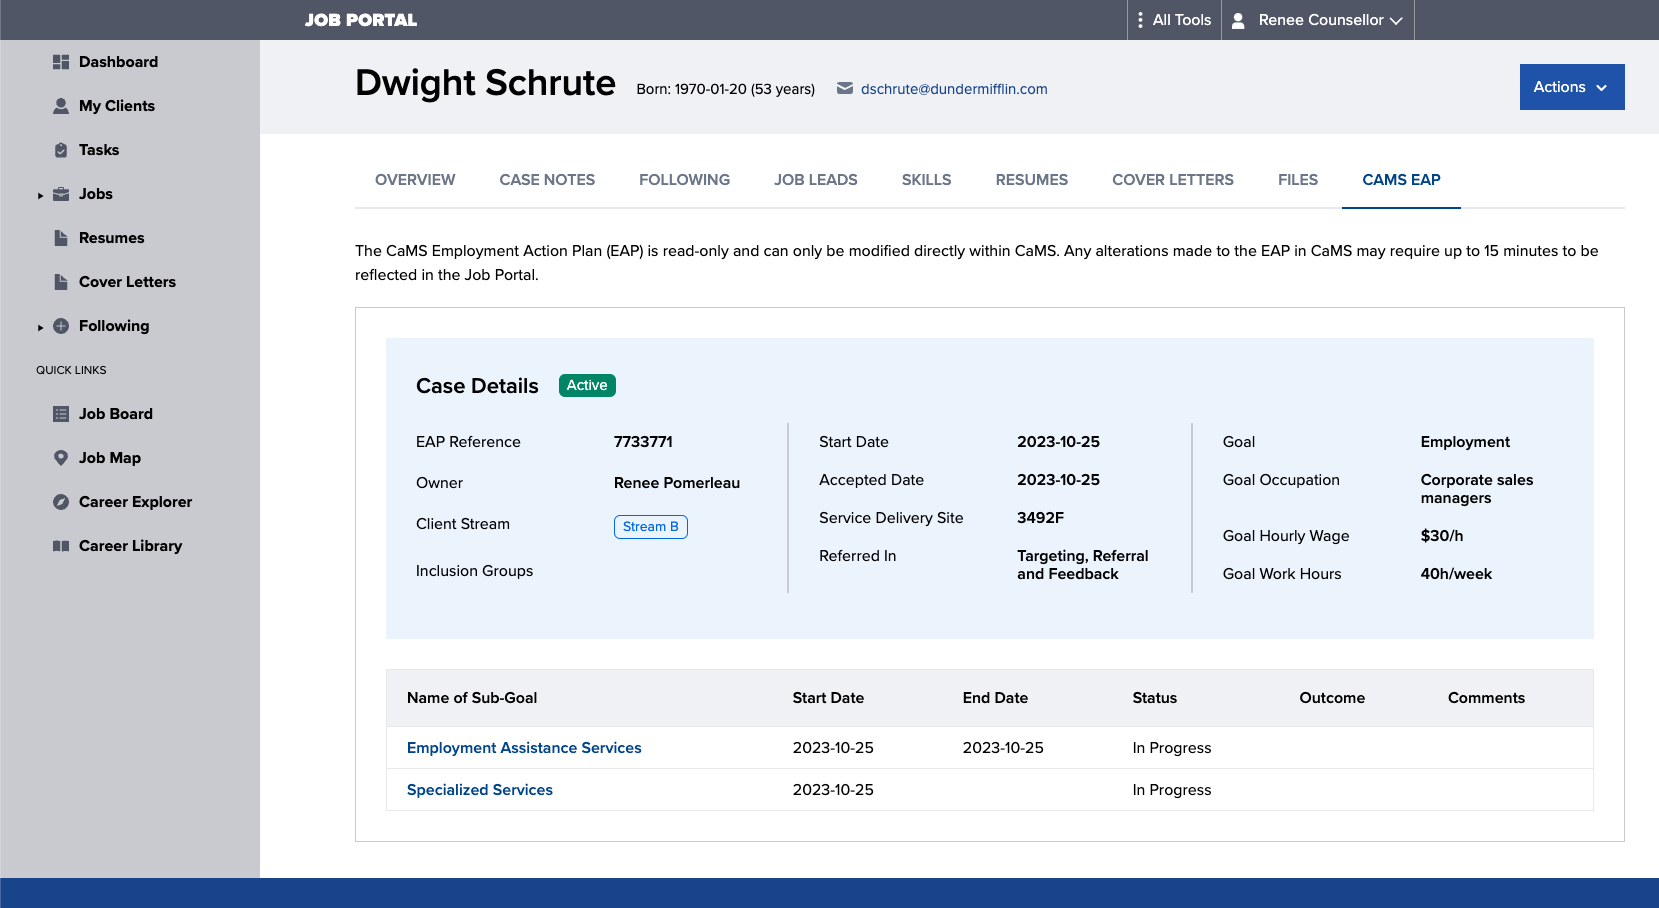
Caseworkers can select a sub-goal to preview the sub-goal and view any related plan items.

No. At this time, none of the CaMS data shown in the Jobs Portal is visible to clients.
Link portal user to CaMS
Existing Job Portal accounts can be linked to their CaMS profile. See Add New Clients for instructions on how to add new Job Portal accounts.
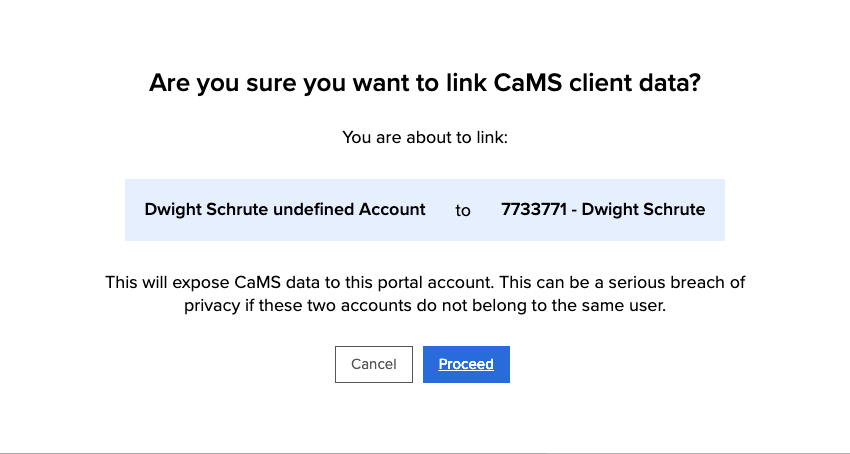
1. Navigate to the client’s profile in the Job Portal and select Actions > Link to CaMS.

2. Enter their CaMS Client Reference Number and hit Enter/Return or select the magnify icon.
If the result shows the correct CaMS client, select Link Account.

3. Confirm you wish to continue with this action by selecting Proceed. This will complete the linking process.
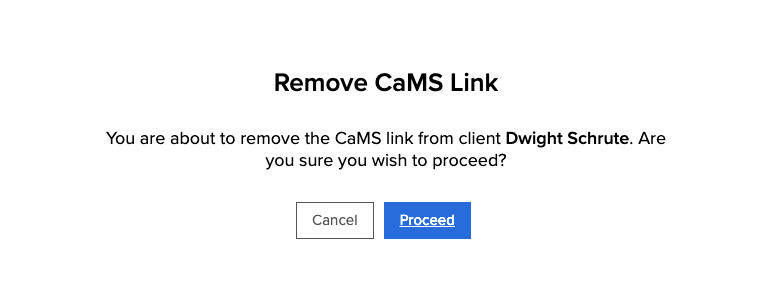
Unlink portal user from CaMS
Job Portal accounts that have been linked to a CaMS account can be unlinked.
1. Navigate to the client’s profile in the Job Portal, and select Actions > Remove CaMS Link.

2. Confirm you wish to continue with this action by selecting Proceed. This will complete the unlinking process.