Who can use this feature?
- Portal Staff with the Staff permission
- Administrators
Frequently asked questions
Imagine you’re at a big amusement park with various rides and attractions. In this park, roles are like different types of tickets you can have—each ticket type allows access to a specific set of rides. For example, a “Roller Coaster Enthusiast” ticket might get you onto all the roller coasters, while a “Water Park Adventurer” ticket gives you unlimited access to the water slides.
Permissions, on the other hand, are like the individual stamps or marks on your ticket that specify exactly which rides you can go on. Even if you have a “Roller Coaster Enthusiast” ticket, you might have permissions (or stamps) that allow you on the “Giant Drop” and the “Loop-the-Loop” but not on the “Twister.”
In the Jobs Portal:
- Roles are general categories that group together certain types of access or actions you can perform within the website or portal.
- Permissions are more specific and detail exactly what actions a Portal Staff user can perform.
Roles
Administrator
Administrators have access to all the administration features within the website such as managing users.
Editor
Editors can publish and manage posts including the posts of other users.
Employer
Employers have access to a labour market insights dashboard, along with quick access to Community Data Tools like the Talent Map, Sector Map, and more.
Job Board Administrator
Job Board Administrators have a fixed set of permissions which focus on managing Jobs, Employers, and Taxonomies within the Job Board. This role cannot be assigned any additional permissions.
Jobseeker
Jobseeker accounts can build resumes and cover letters, save jobs and track their status, view a personalized job feed, and more.
Portal Staff
Users who can be assigned permissions to manage some or all aspects of the service provider portal. See Permissions for more details on tailored access and management capabilities for Portal Staff roles.
- Please note: New Portal Staff will not have any default permissions enabled. These will need to be assigned based on their role or access requirements. See Assign Permissions for more details.
Change Role Assignment
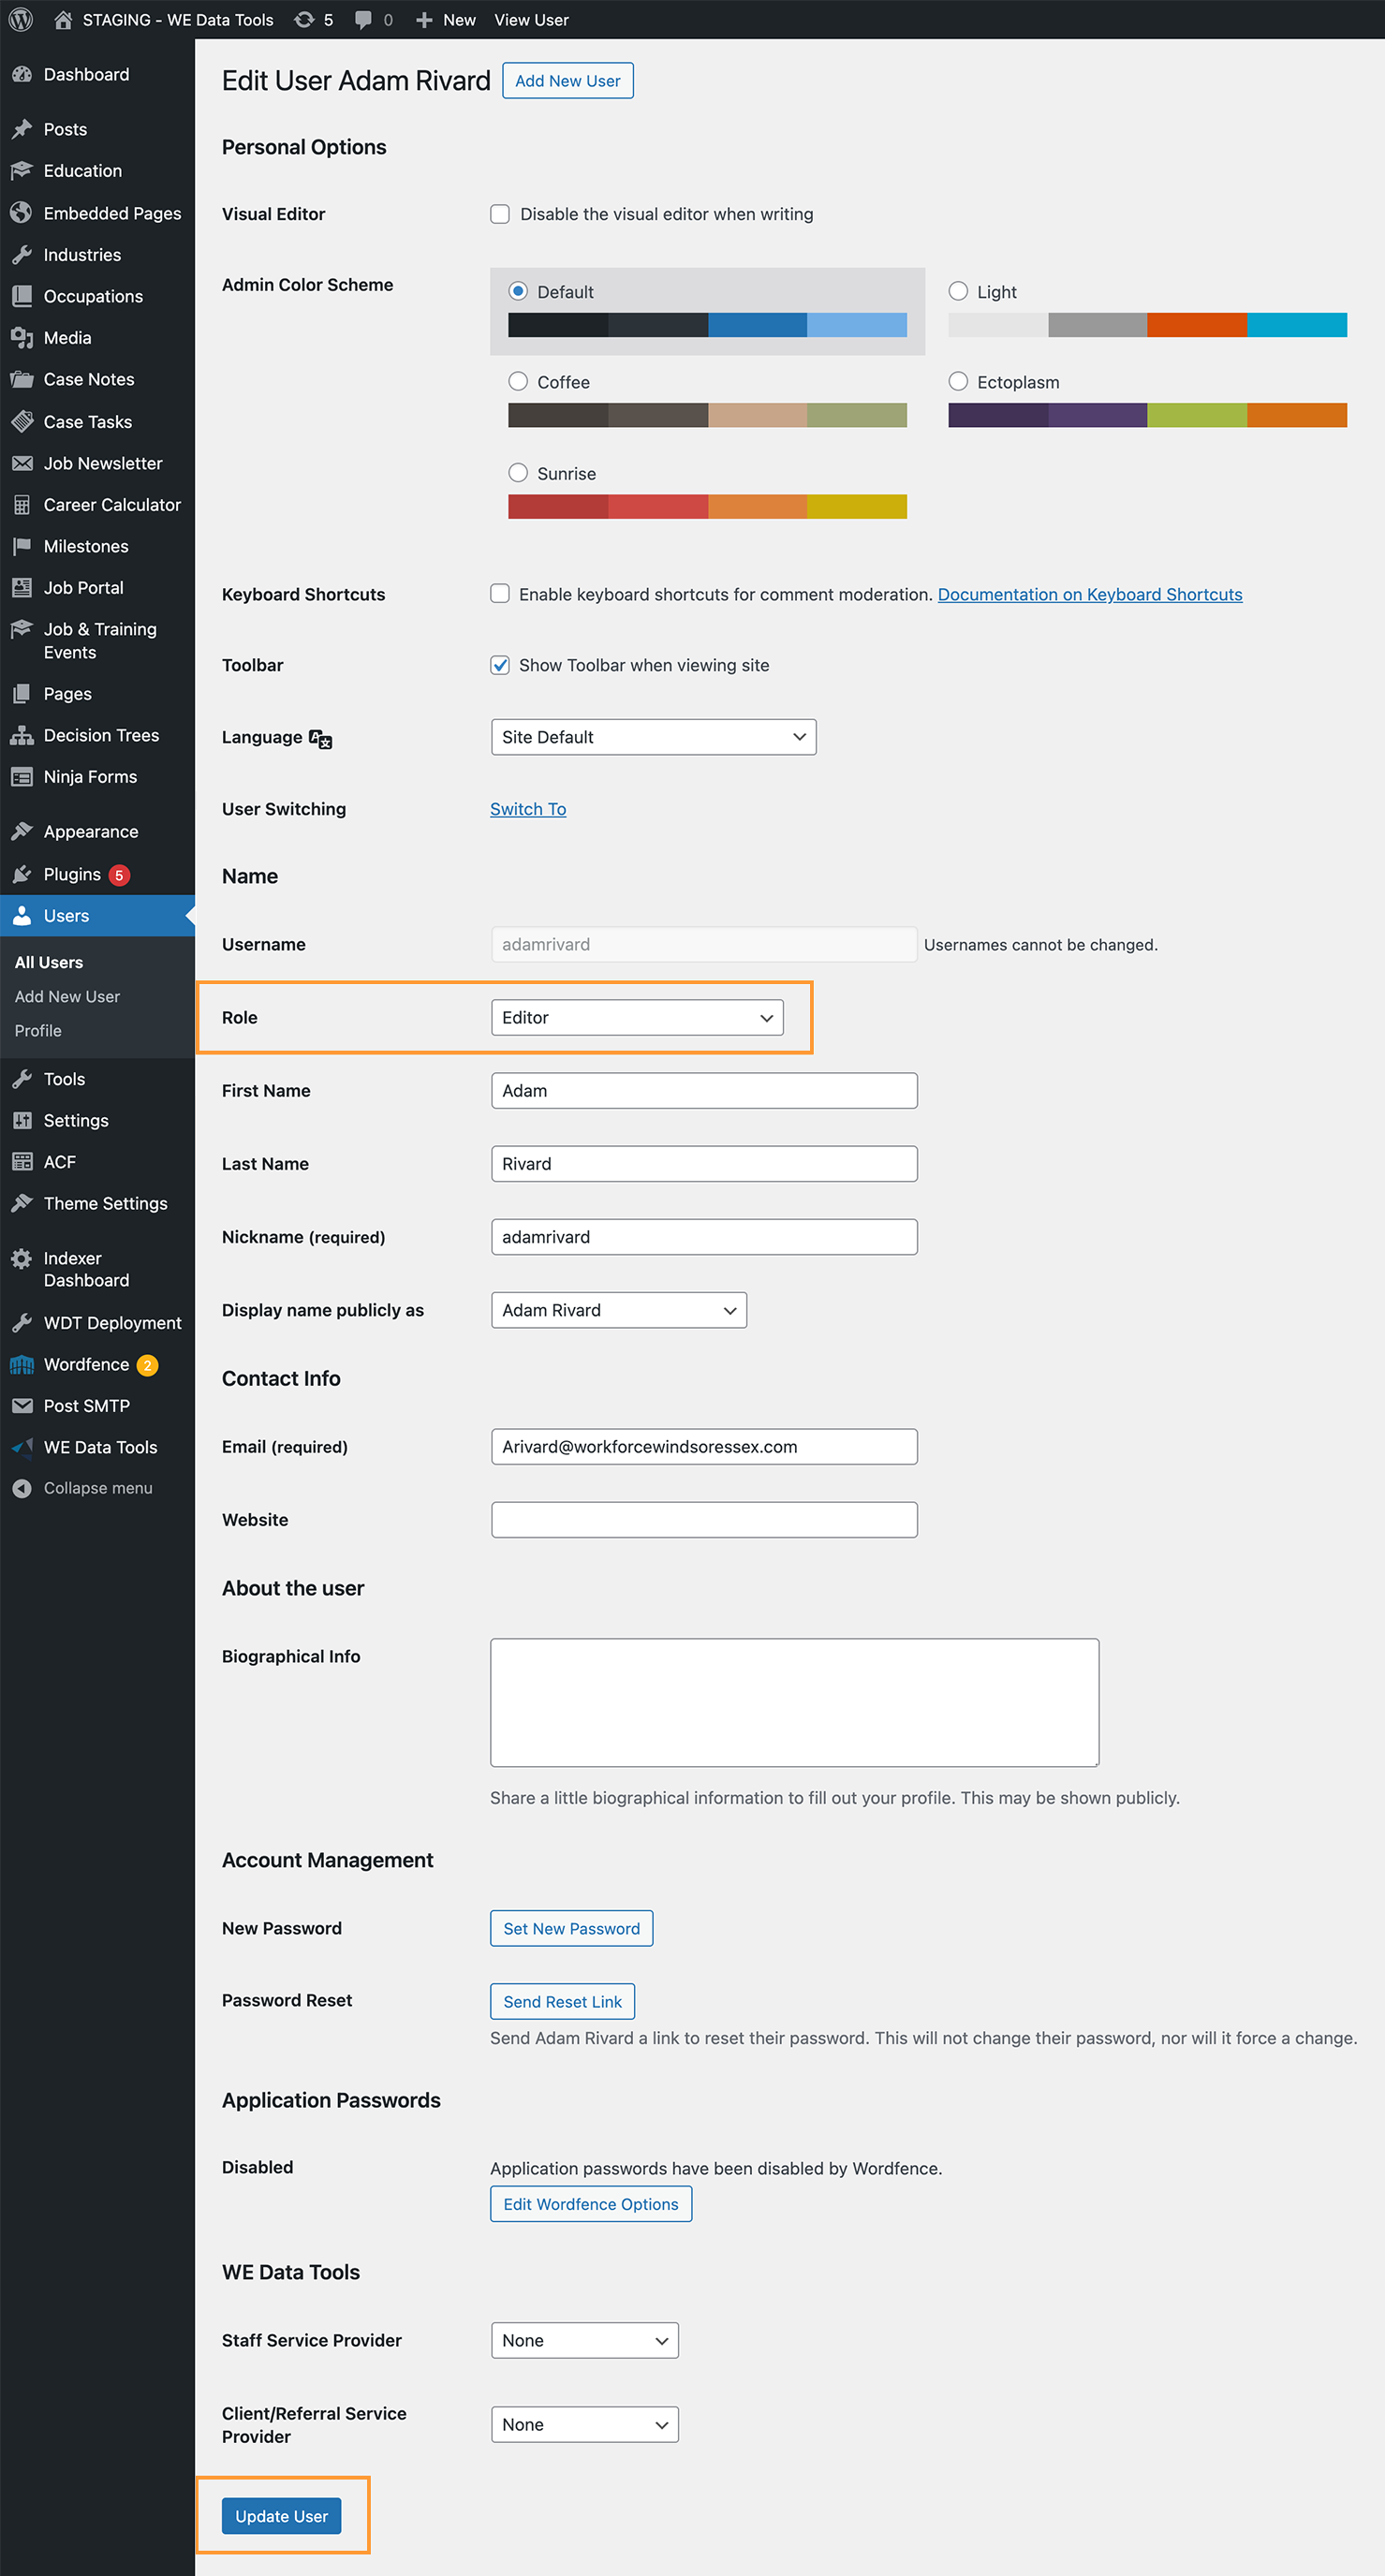
Changing role assignment can only be done by Admin users through the WordPress backend.
2. Find the user you wish to edit by locating them in the list or using the search field to look-up their name or email address, then select Edit below the user’s name.

3. Look for the Role heading, select the new role you wish to assign, then hit the Update User button at the bottom of the screen.

Permissions
The WDT Service Provider Portal permission system provides precise control over what staff can access and manage. These permissions can be set at the individual staff level.
There are 3 levels of permissions:
Service Provider Group Administration
Allows system service managers to assign permissions for an individual staff member to manage specific aspects across their group of service providers, including:
- Service Providers
- Staff
- Clients
- Referrals
- Job Postings
- Tasks
- Reports
Service Provider Administration
Service providers can assign permissions for the individual staff member to manage the organizations:
- Staff
- Clients
- Referrals
- Job Postings
- Tasks
- Reports
Caseworker Administration
Service providers can assign permissions for the individual staff member to manage their own:
- Clients
- Job Postings
- Tasks
- CaMS Linking/Unlinking
Portal Staff can be assigned any combination of permissions across any of the three access levels.
- Please note, to fully leverage some of these new permissions, further implementation efforts are necessary, particularly in managing service providers.

Assign permissions
1. To assign permissions to a staff account, navigate to the staff member’s profile by going to People, select Filters, choose the Staff User Type, then select the staff member you wish to assign permissions to.

2. From the Staff Profile, select the Permissions tab. Choose the desired permissions by selecting the checkboxes and then hit Save to complete the process.
- Selecting the checkbox next to the permission level heading, ie: Caseworker Administration, will allow you to quickly enable all of the settings within that category of permissions.


