1. In the Admin Dashboard, go to Job Board > NOC Tags. On the right-hand side is a listing of all the NOC Tags with the corresponding description, slug and count of the number of job postings associated with each tag.
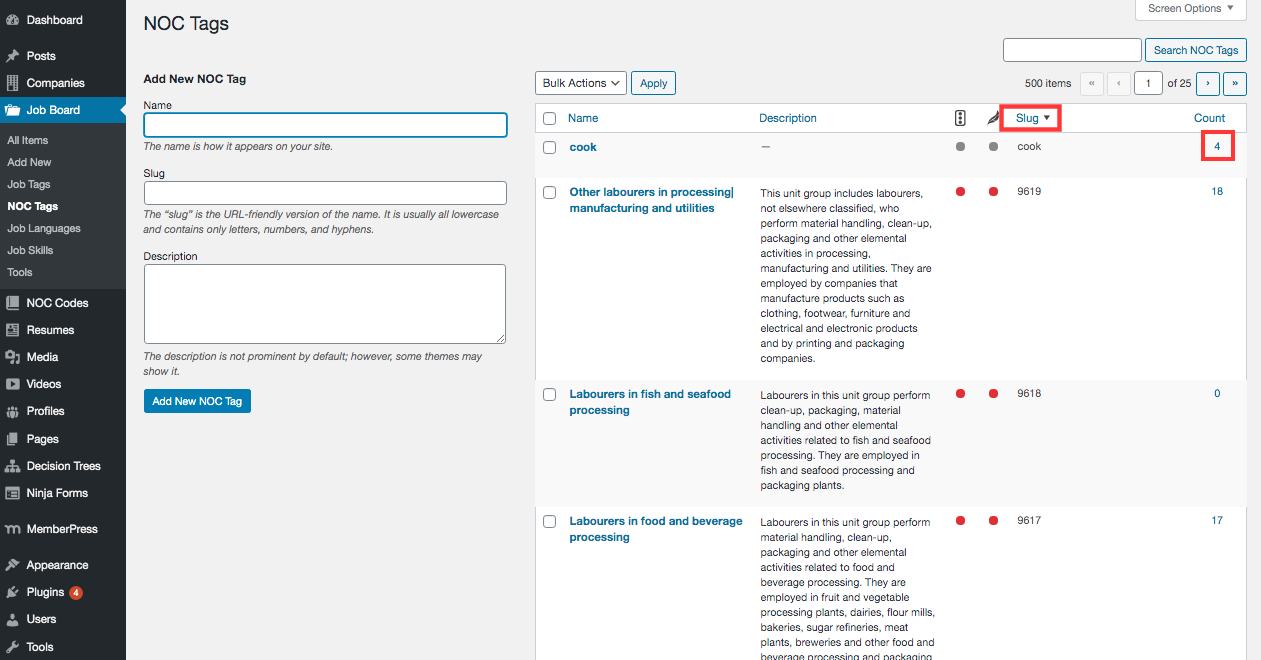
2. In some instances, incorrect NOC Tags will be attached to a job posting. For example, “Cook” jobs should have the NOC Tag “Cooks” with a “S”. Sort the Slug column by clicking the word Slug and the grid will update to descending order. This will put any NOC Tags with a word as the Slug first. This is important because true NOCs have a numeric slug. If this occurs, click on the number in the Count column.
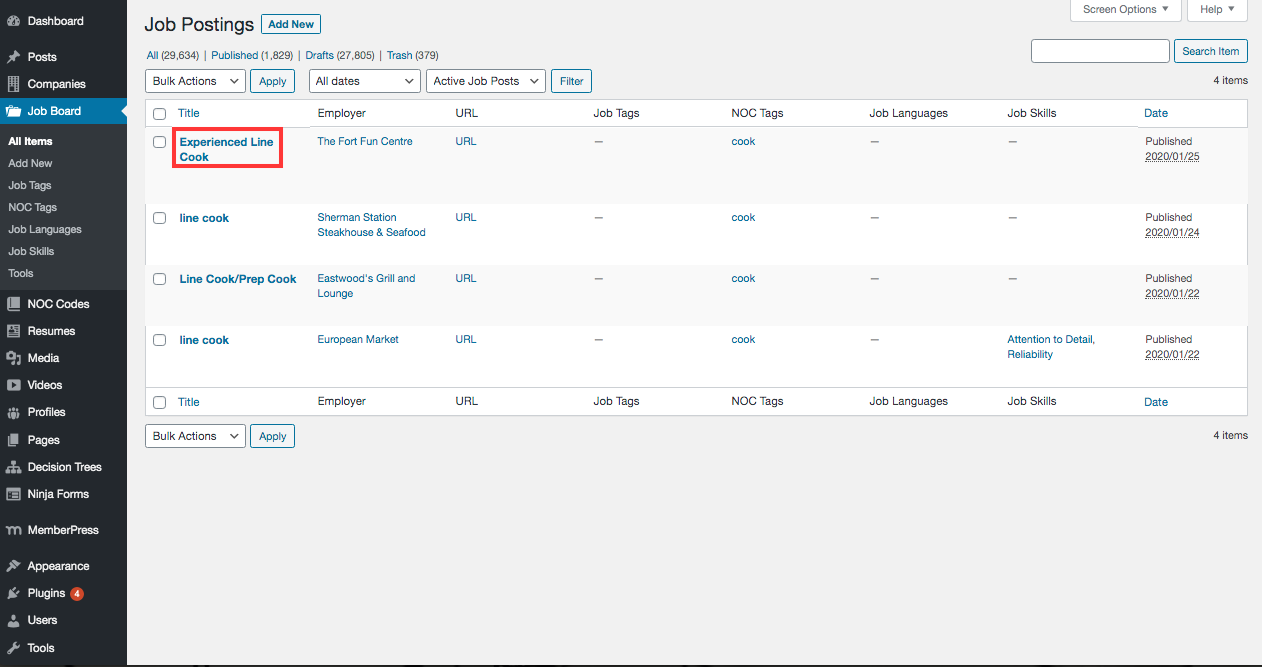
3. The job postings with that NOC Tag will populate the Job Postings grid. Click on the Job Posting Title of the job posting that is to be updated.
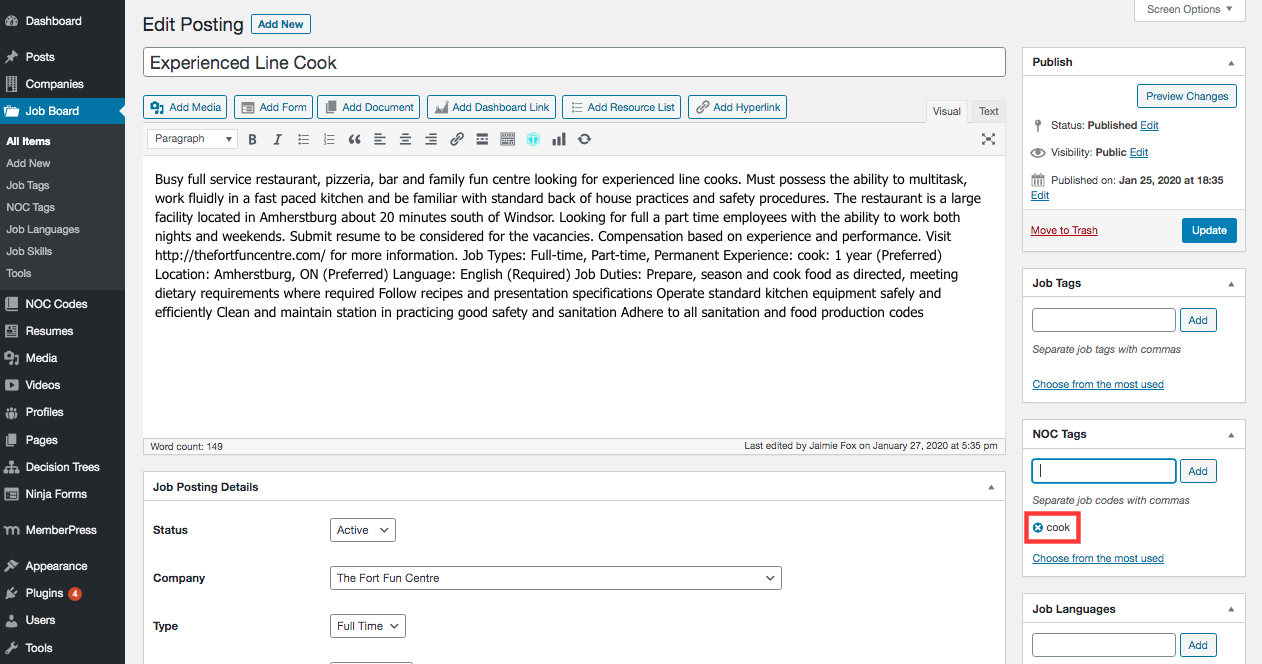
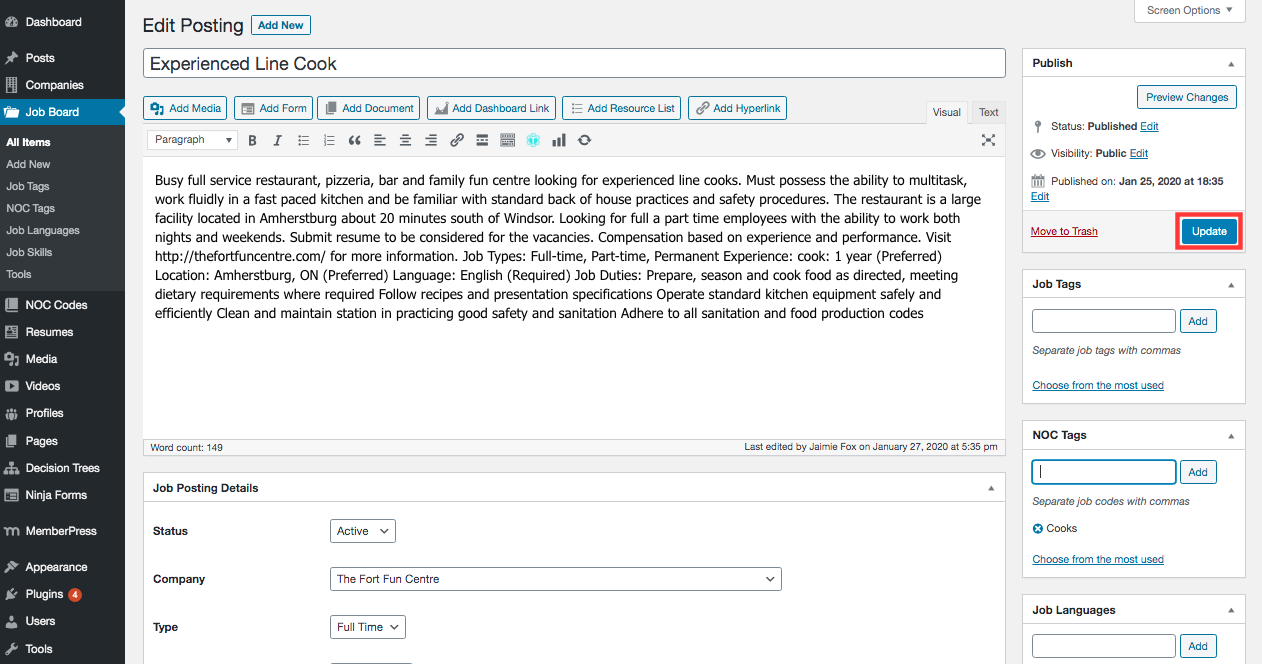
4. On the individual job posting screen the NOC Tag is on the right-hand side. Click the “X” next to the NOC Tag to remove it.
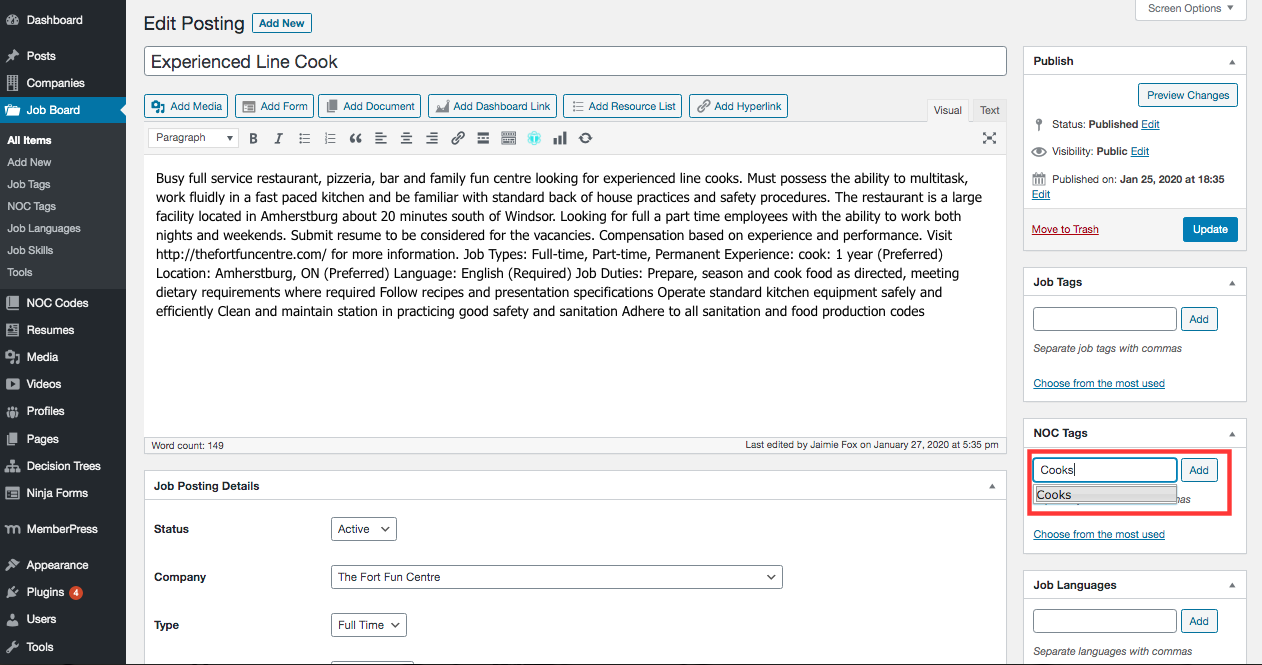
5. In the text box, begin typing the proper NOC Tag and a list of relevant tags will appear in the list. Select the NOC Tag from the List. Click Add.
NOTE: It is important to select a tag from the list or a new tag will be created.
6. Once the NOC Tag is added, click Update.
Bulk Edit
Alternatively, NOC Tags can be updated in bulk.
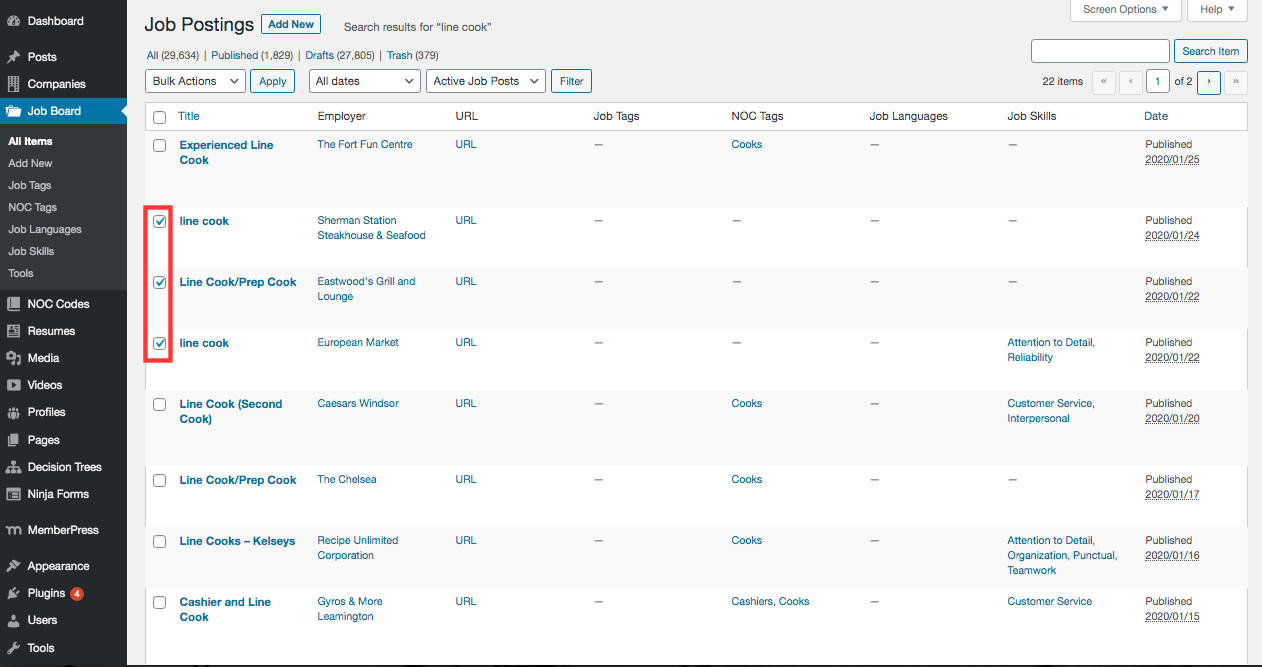
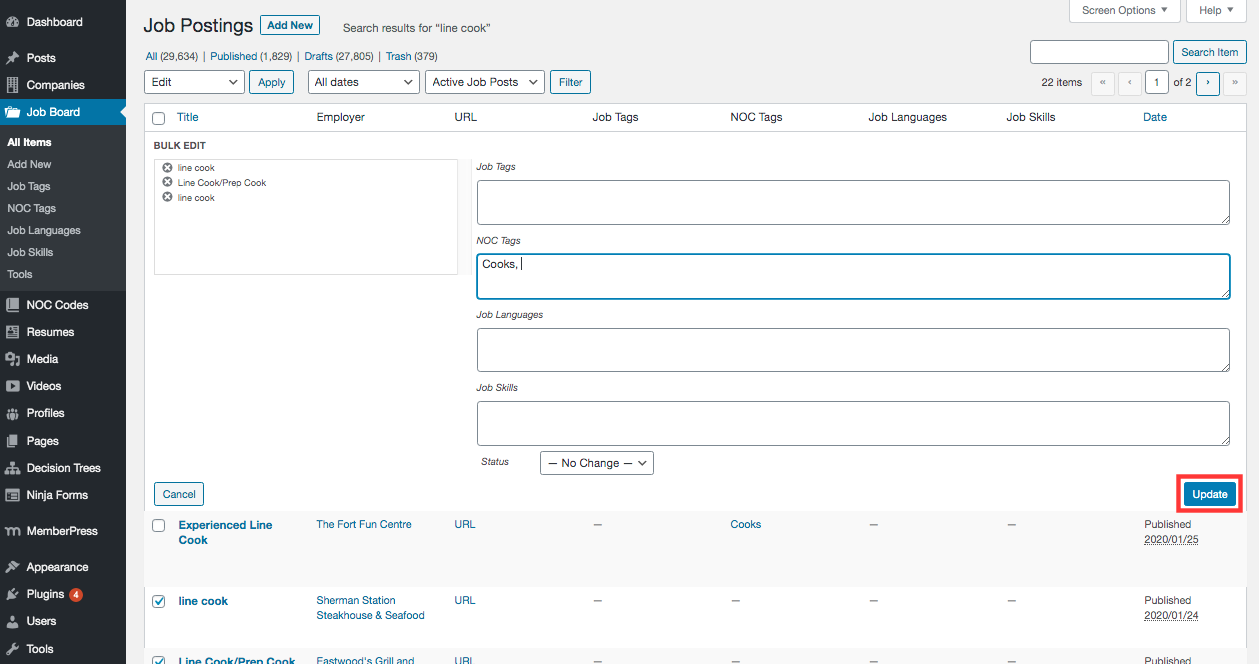
1. In the Job Posting grid, check the box next to the job postings to be updated.
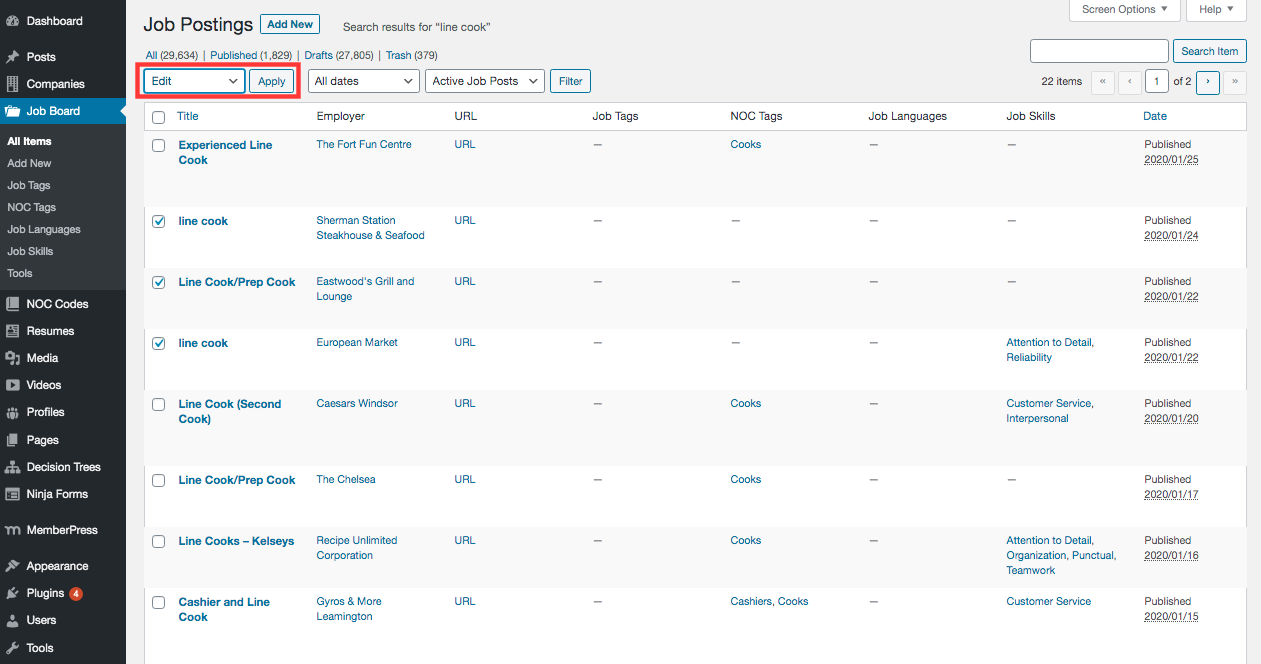
2. Click the dropdown at the top to select Edit and click Apply.
3. In the NOC Tags text box, type the proper NOC Tag and a list of relevant tags will appear in a list. Select the NOC Tag from the list.
NOTE: It is important to select a tag from the list or a new tag will be created.
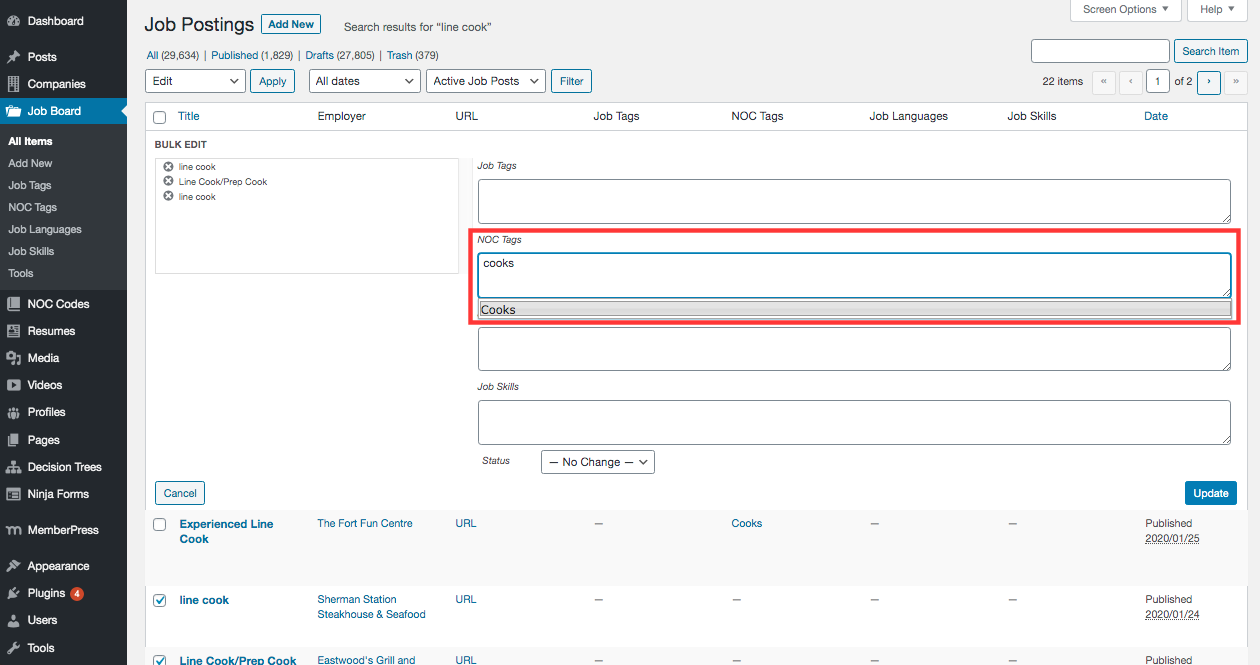
4. Click Update.
Deleting NOC Tag
1. After the incorrect NOC Tag has been removed from Job Postings, it can be deleted by hovering over the NOC Tag in the grid and clicking Delete.
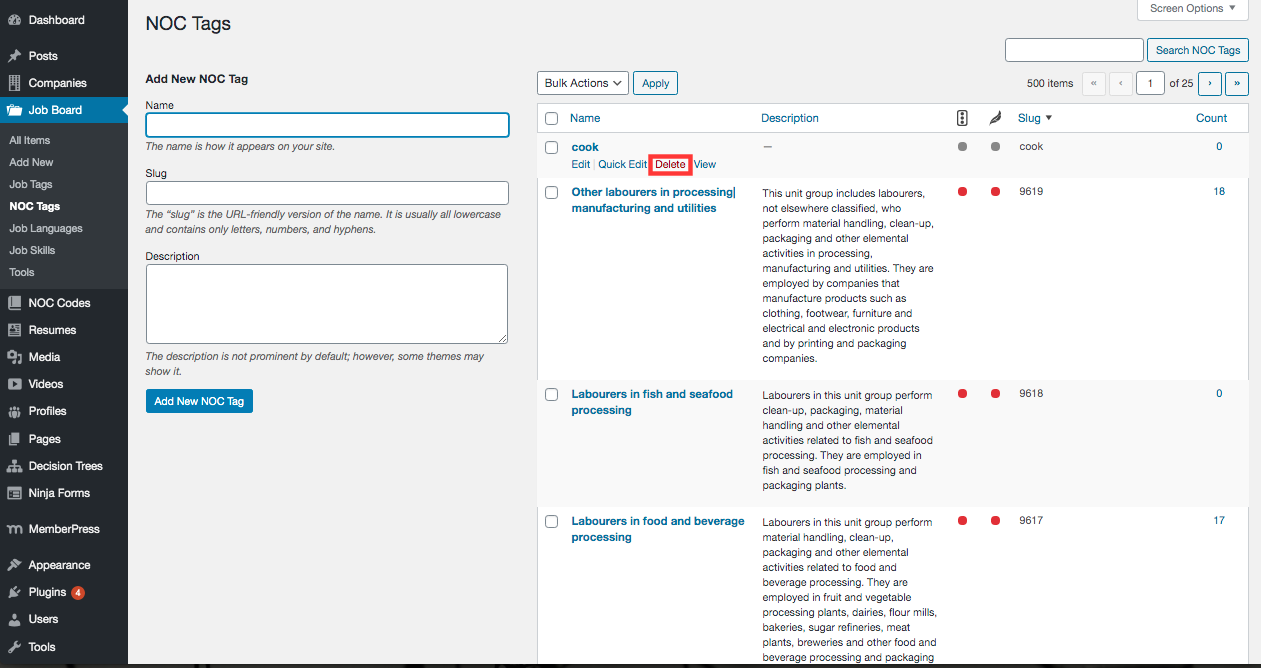
NOTE: If a NOC Tag is deleted and a job posting is associated to it, it will remove the tag from the posting. The posting can be found on the Job Posting grid and treated as an Unresolved NOC Tag.
